This tutorial will instruct you on how to Make a vexel portrait in
Corel Draw. This tutorial is not for beginners in Corel. To follow the
tutorial you need to know the basics of Corel DRAW like trimming,
welding, drawing with bezeir tool etc.
If you have any difficulties you can contact me. Hope u like it.


Note: dont forget to remove outlines.


Now the tutorial How to Make a Vexel Portrait in coreldraw has been finished. If you need any tutorial to improve your skill in corel please visit other tutorial on this blog. Ok thanks for coming.
If you have any difficulties you can contact me. Hope u like it.
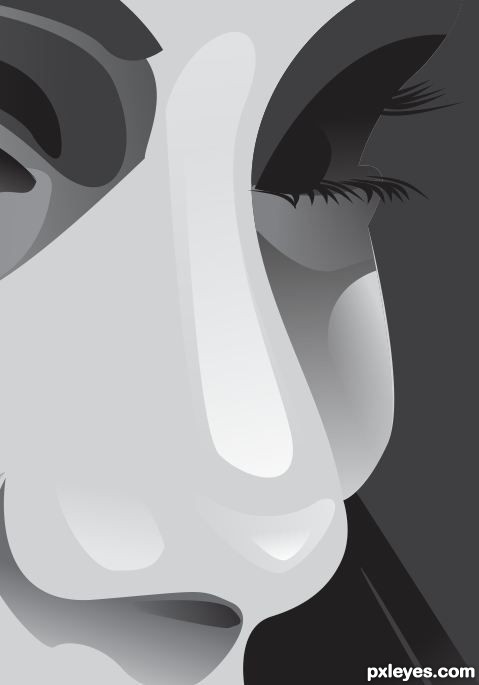
End result:
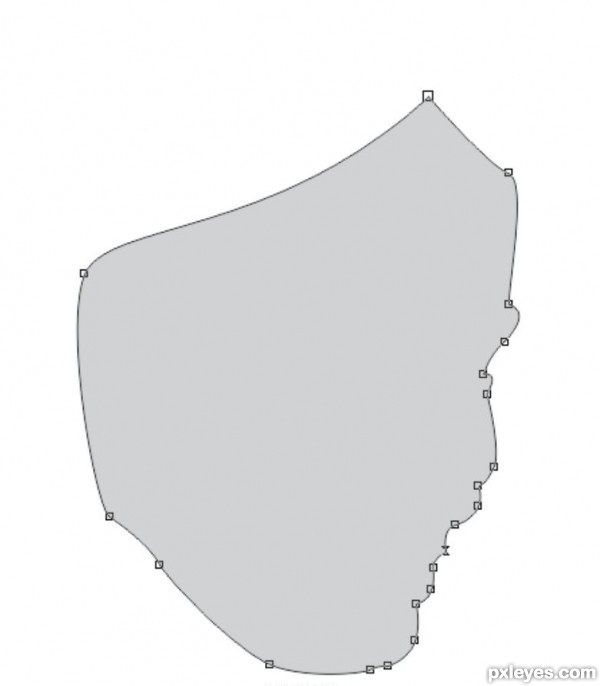
Step 1
Draw a silhouette of a profile face with bezier tool. Fill it with #D2D2D2Step 2
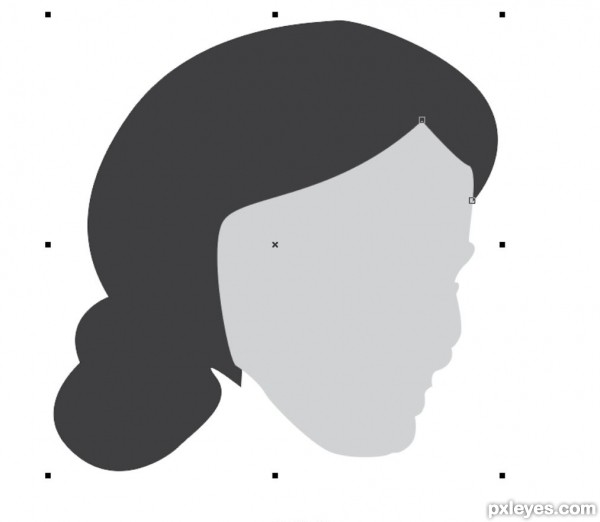
Draw the hair using bezier tool. Select the face, Press Shift now select the hair. Click Trim. Fill it with #4F4F4F.Step 3
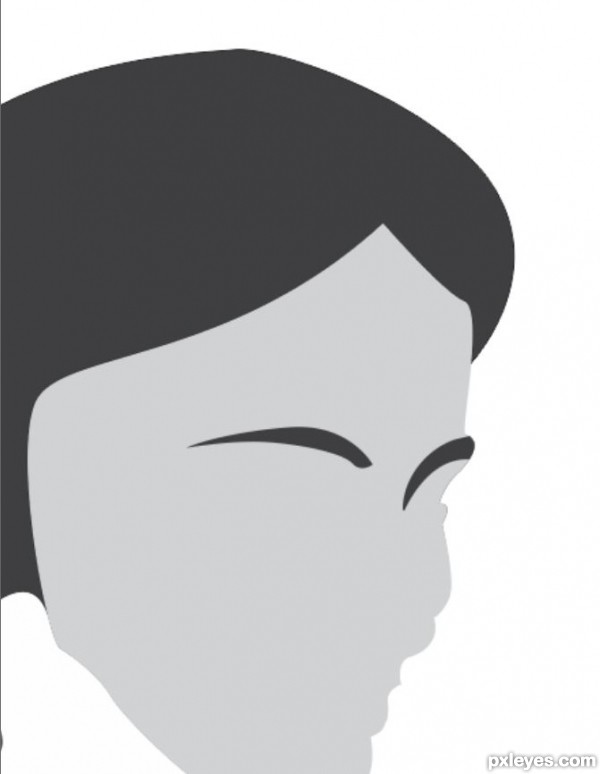
Draw the eyebrows using bezier. Fill it with #4F4F4FStep 4
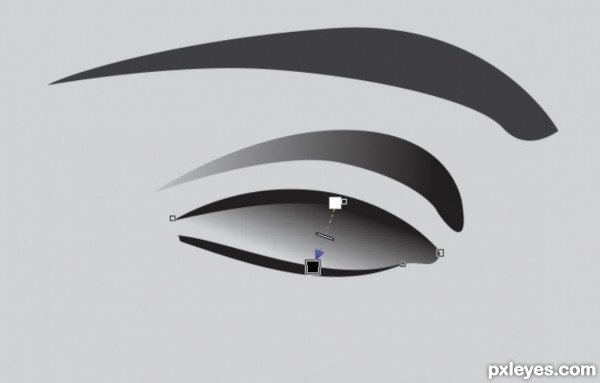
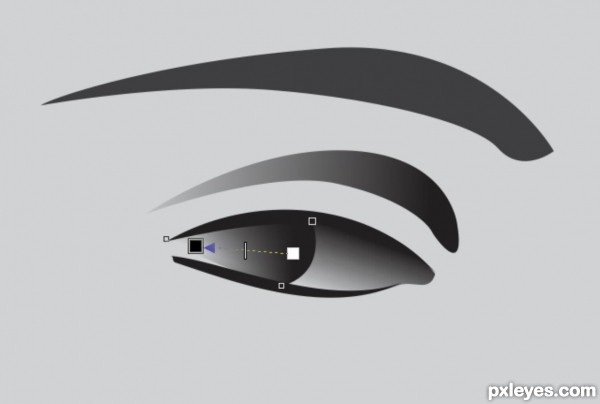
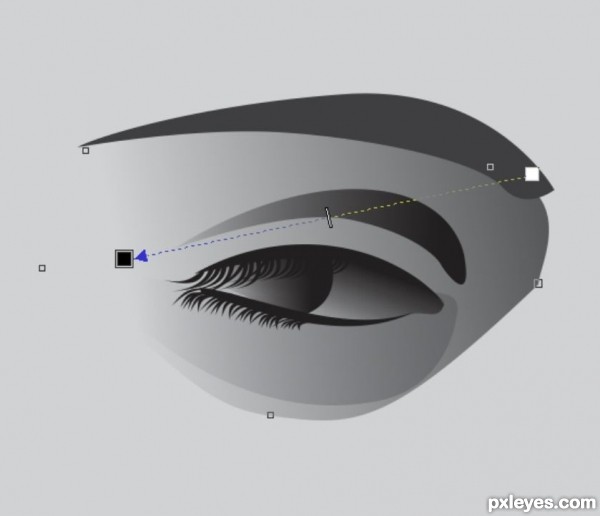
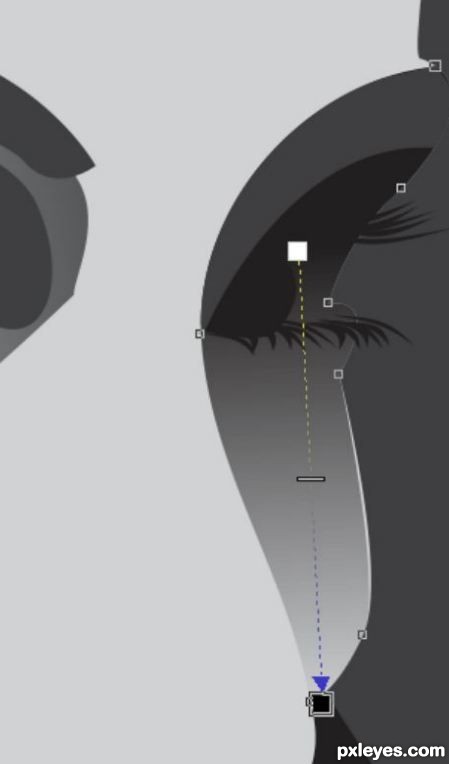
Start drawing the eye on the left side. Use transparency as shown in the image below.Step 5
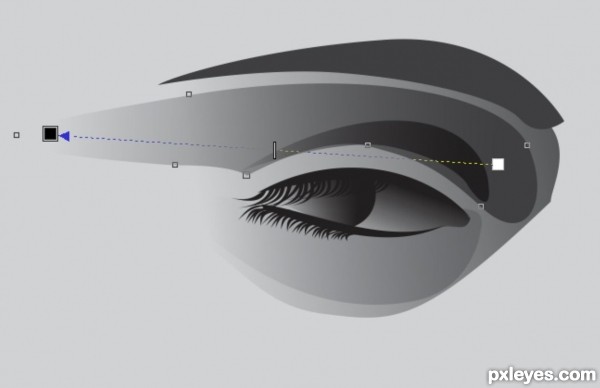
Draw an eye like shape .Fill it with #4F4F4F. Place it between the black lines as shown in the image. It should be placed behind the black lines. To place it behind the black lines Press Ctrl+Pg down (3 times or as much as needed). Use transparency as shown below.Step 6
Draw eyeball using ellipse tool. Fill it black color. Use transparency.Note: dont forget to remove outlines.
Step 7
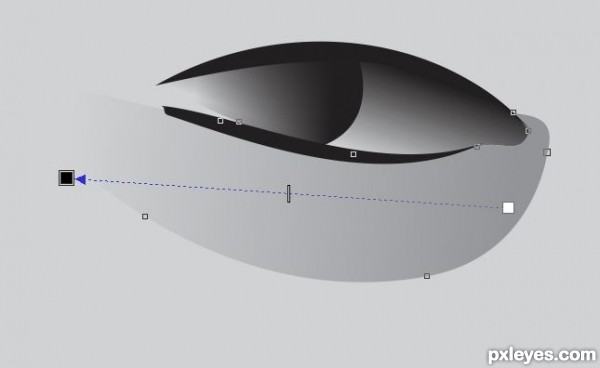
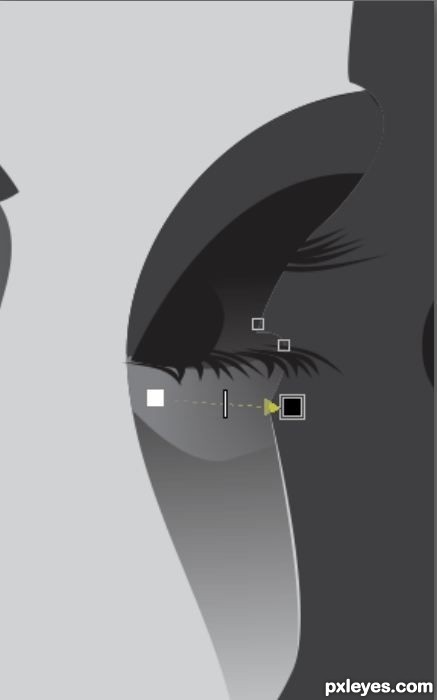
Now we have to shade the surrounding areas of the eye. Draw the shape( as shown in the image), fill it with #787878. Apply transparency.Step 8
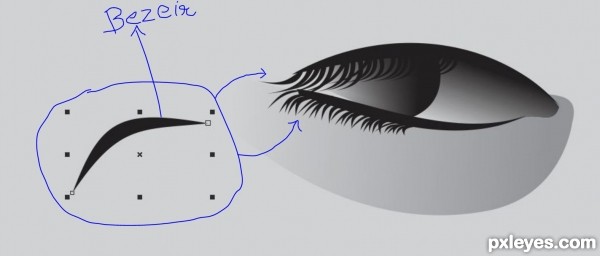
Now for the eyelashes: Draw one eyelash with bezier tool. Fill it with #000000 (black). Copy the eyelash to make "many" eyelashes. Keep changing its size after copying so that they do not look similar.Step 9
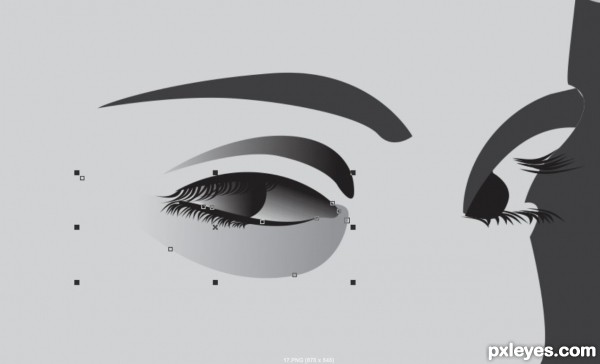
Now start drawing the eye on the right side. Copy the eyelashes adjust them. Draw the eyeball of the right eye too.Step 10
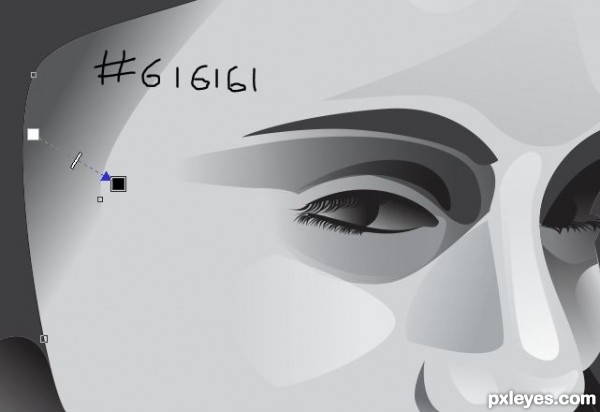
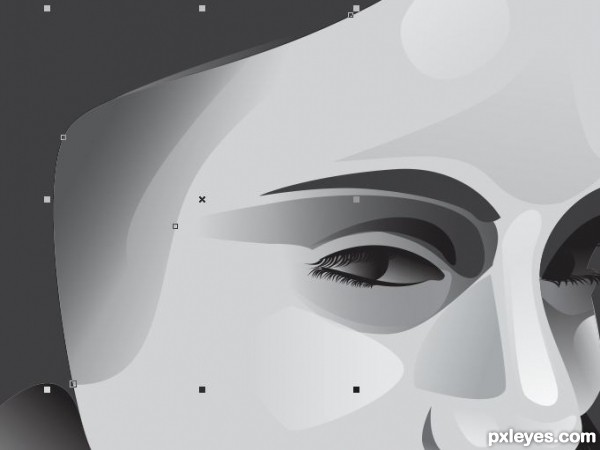
Now we need to shade the left eye. Draw a huge shape surrounding the left eye. Fill it with #636363. Apply transparency. To place it behind, Press Shift+pgdown, then press Ctrl+pgup. You will get it in the correct place i.e. just above the face.Step 11
Shade the eye using #4D4D4D color.Step 12
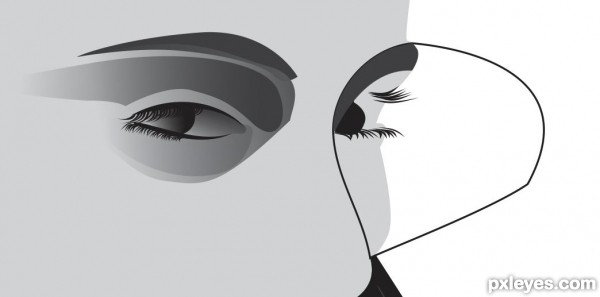
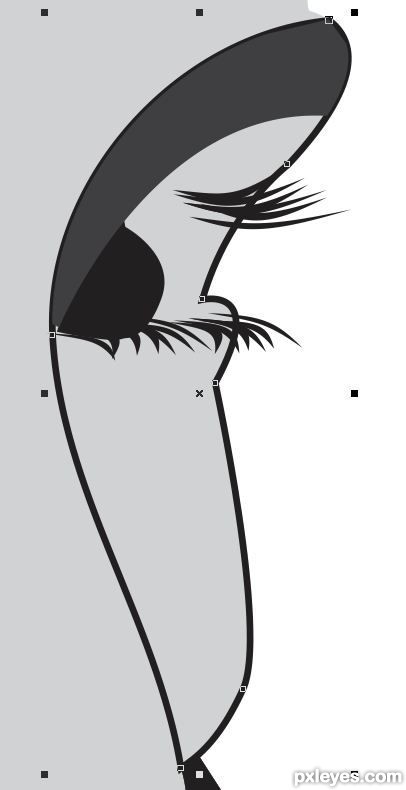
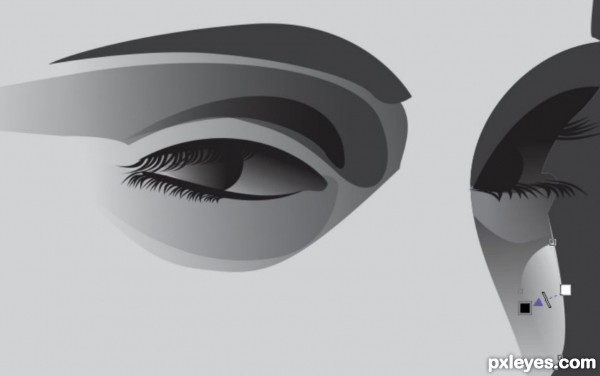
Now we have to shade the right eye. With bezeir start drawing the outline of the nose and enclose the space so that the right eye and cheek comes within the enclosed shape.Step 13
Select the recently drawn shape, press shift and select the face. Click intersect. We will use this intersection process in coming steps too.Step 14
Fill this shape with #000000 (Black) color and remove the outline. Apply transparency as shown.Step 15
Use the same intersection process to further shade the eye. Fill the shape with #696969 and apply transparency.Step 16
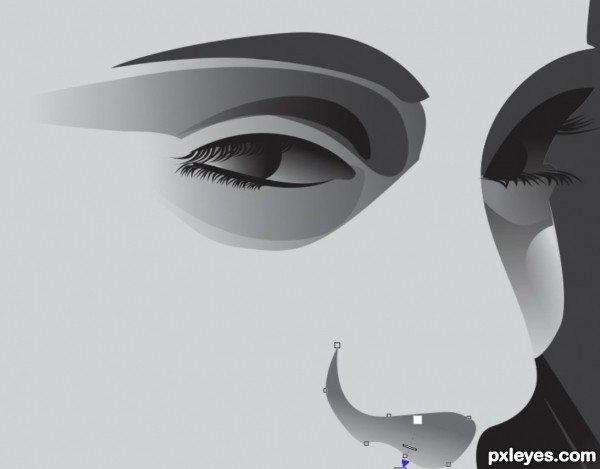
Draw a small shape below the right eye as shown in the image. This is for highlighting the cheek. Fill it with #D9D9D9. Apply transparency.Step 17
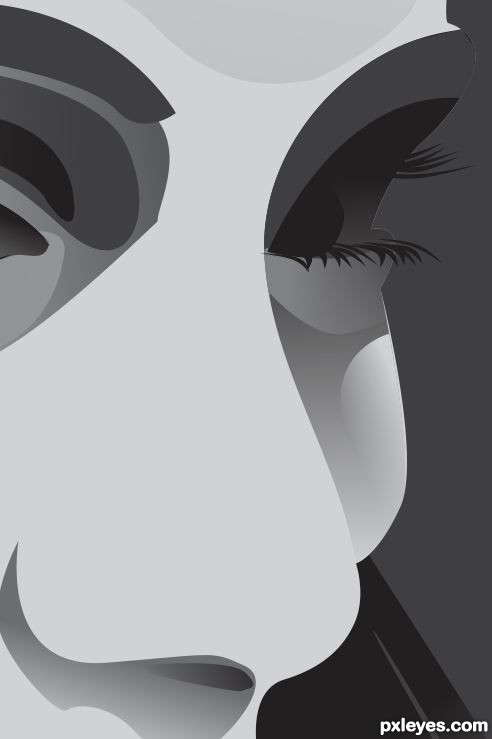
Now draw the nose. Fill it with #757575. Apply transparencyStep 18
Draw the nostrils. Fill the color #4F4F4FStep 19
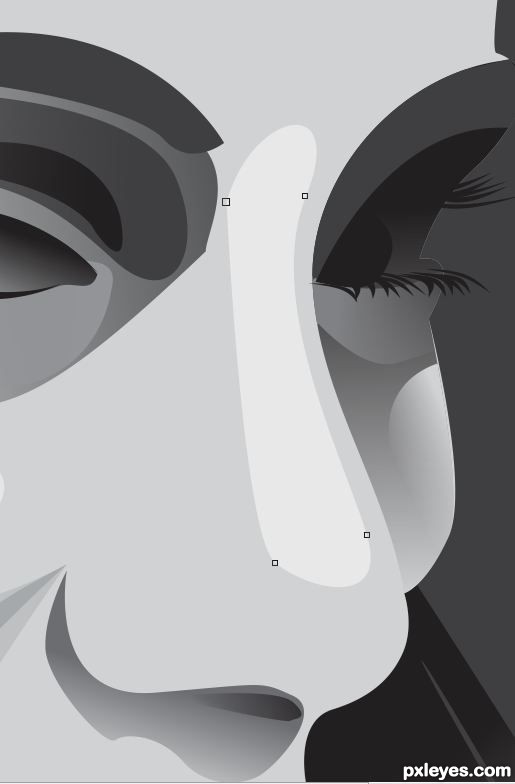
Start shading the nose. Fill this shape with #E9E9E9.Step 20
Apply transparencyStep 21
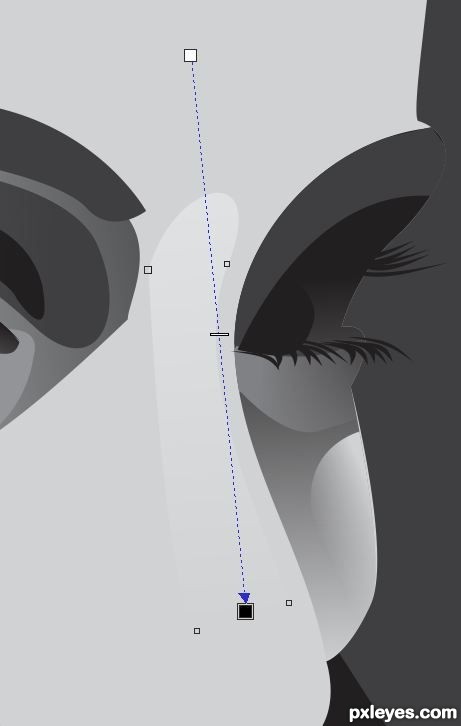
Reduce the size of the shape drawn in the previous step. Fill it white color. Apply transparency in opposite direction i.e. from bottom to topStep 22
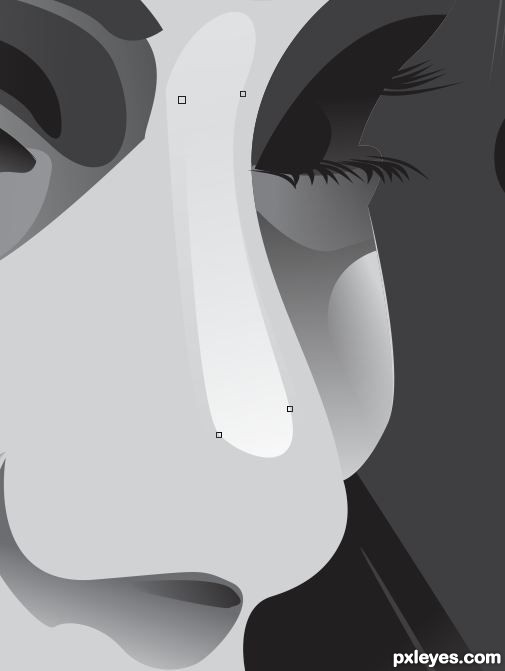
Few more highlights and the nose is complete.Step 23
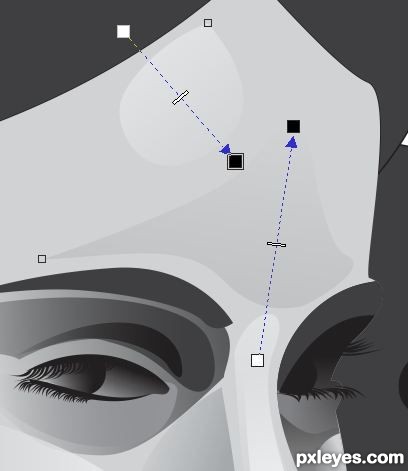
Draw a triangle with round edges. Fill it with #A8A8A8. Apply transparencyStep 24
Shade the foreheadStep 25
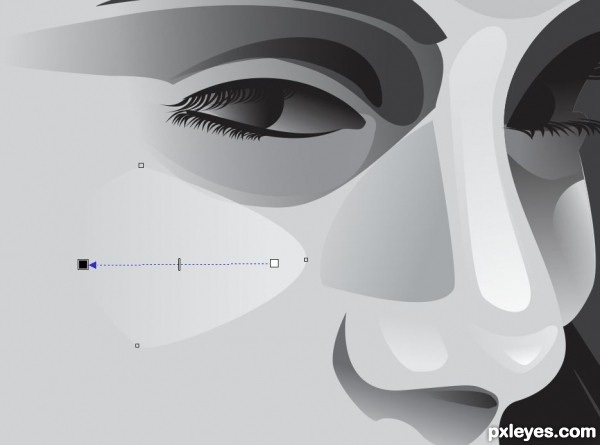
Highlight the cheek. Draw the round-edged triangle. Fill it with #ECECEC. Apply transparency.Step 26
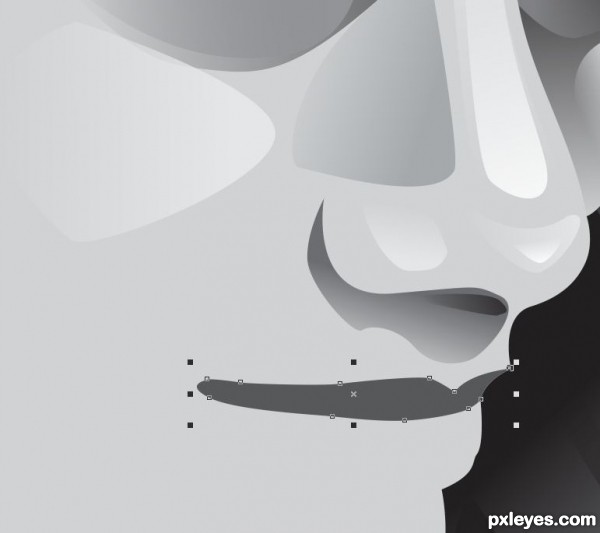
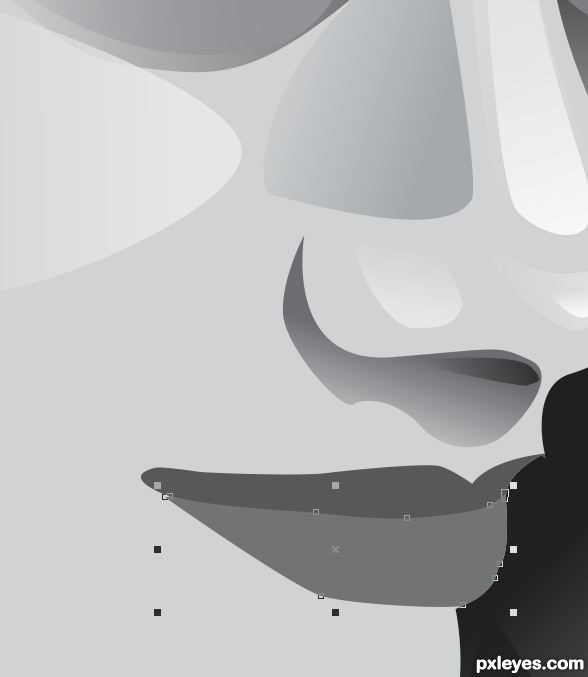
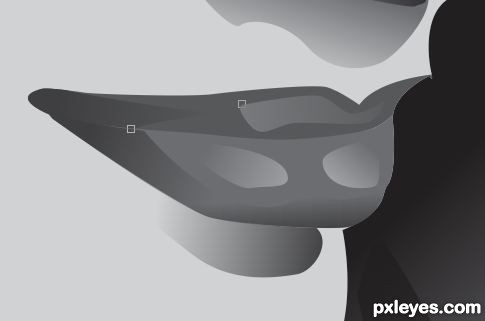
Draw the upper lip. Fill it with #616161Step 27
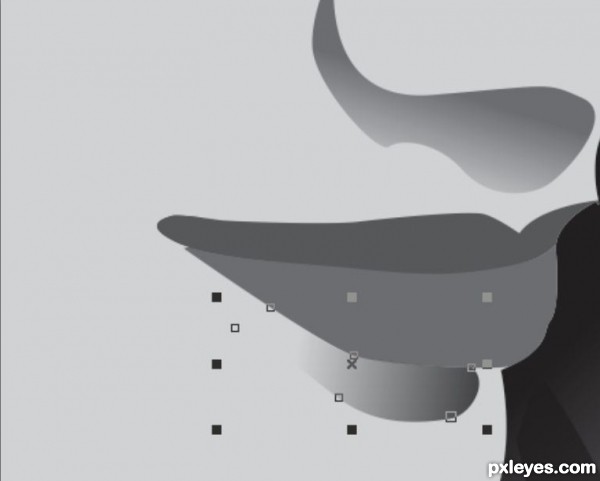
Draw the lower Lip. Fill it with #787878Step 28
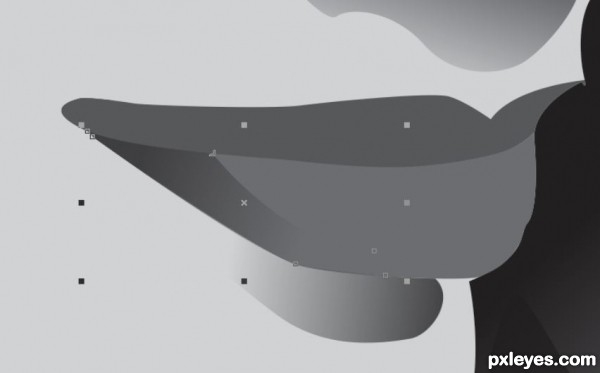
Start Shading the lips.Step 29
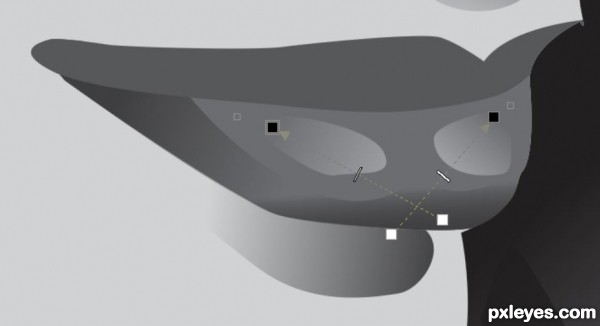
Shade the lower lip. Use intersection process to get the shape. Fill it with #4A4A4AStep 30
Highlight the lips. Use #C2C2C2Step 31
Shade the upper lip too.Step 32
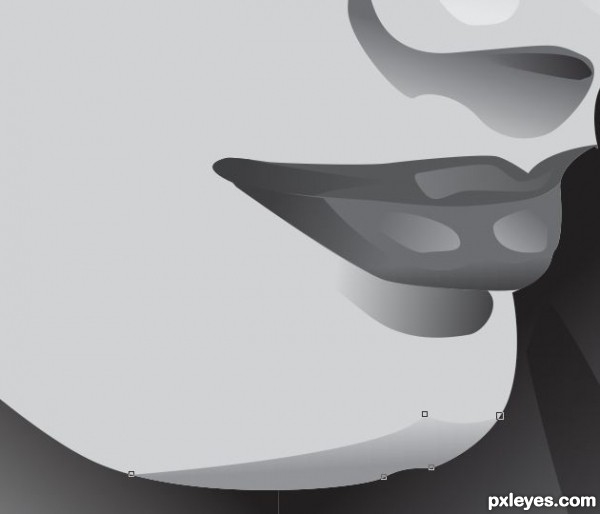
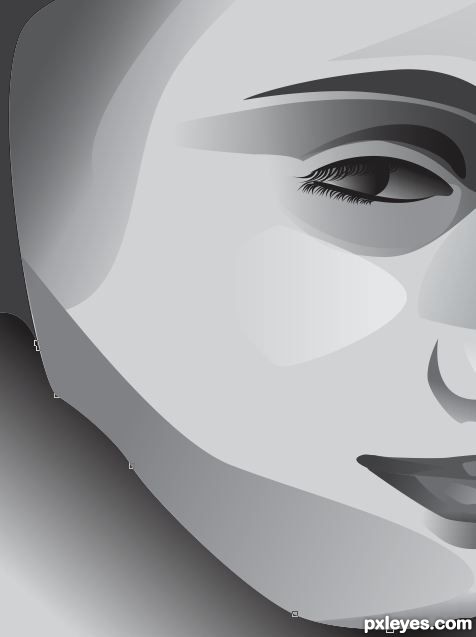
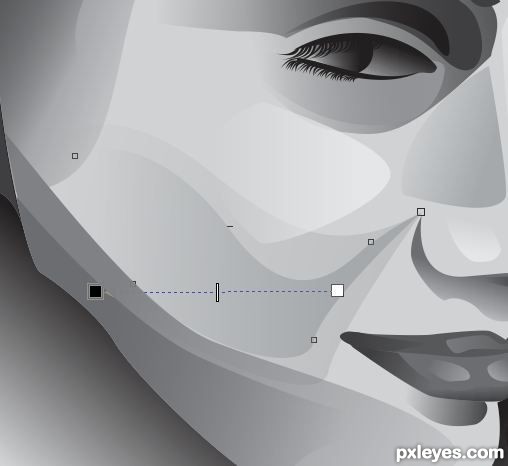
Shade the chin with #999999Step 33
Some more shading. Use the bezier tool to draw the shapes. Fill this one with #616161. Apply transparency.Step 34
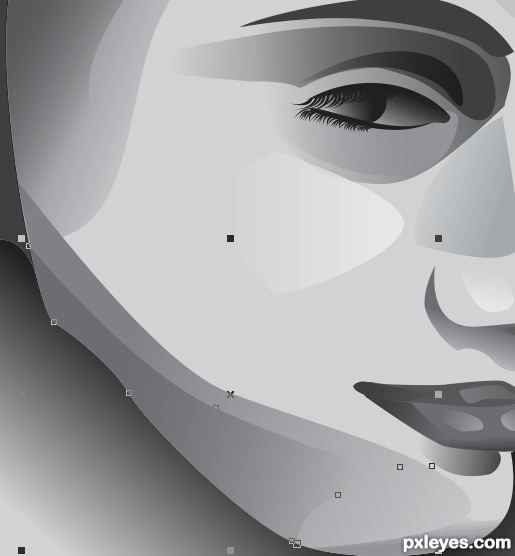
Expand the size of the shape drawn in previous step. Fill this one with #858585Step 35
Shade the jaw area. Fill it with #858585. Apply transparency.Step 36
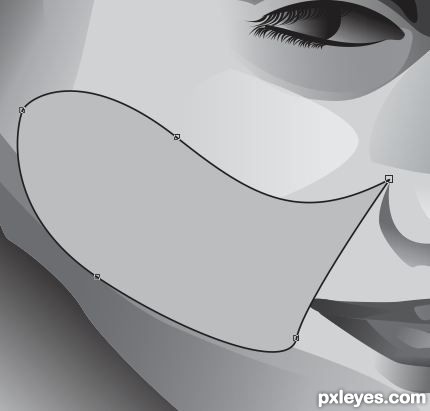
Reduce the size of the shape created in previous step. Fill it with #616161. Apply transparency.Step 37
Create another shape for the cheeks using bezier tool. Fill it with #C2C2C2.Step 38
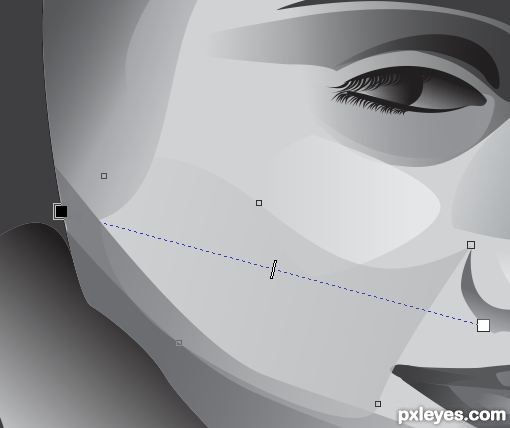
Remove outlines. Make it transparent.Step 39
Reduce its size. Change the color to #AEAEAE. Now the face is complete.Step 40
Similarly you can draw the neck and shade it.Step 41
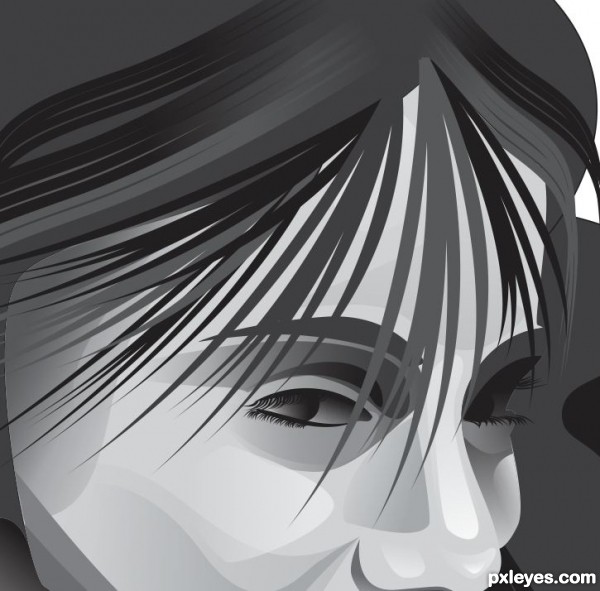
Draw the hairs using bezier. You have to a single hair and copy it to make many. Change their sizes so they look different (just like we did the eyelashes).Step 42
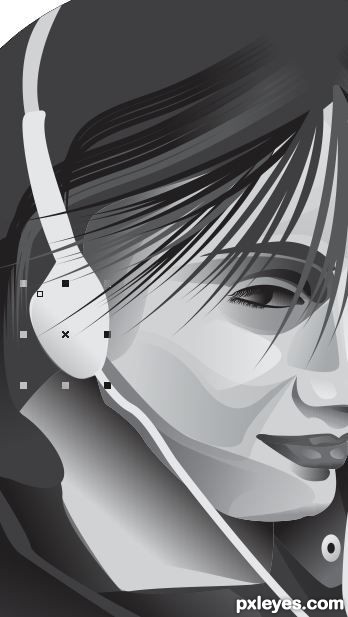
I did not want to draw ear so I here is a headphone. ;)Step 43
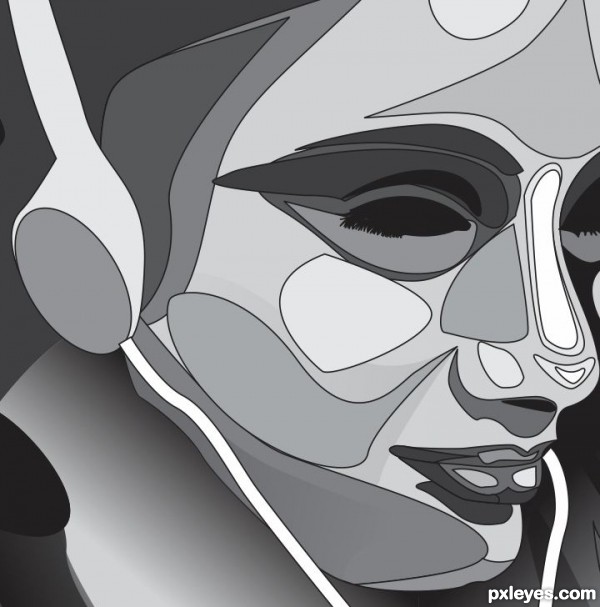
Here is a clip of the face with no transparency and un-removed outlines.Step 44
Here is the Final image.Now the tutorial How to Make a Vexel Portrait in coreldraw has been finished. If you need any tutorial to improve your skill in corel please visit other tutorial on this blog. Ok thanks for coming.
By Niharika Singhal
No comments:
Post a Comment