Have you ever wondered how to create a typography portrait or an
image which is made entirely of text?. This is advanced tutorial. In this tutorial you will learn
how to create Awesome Typography Graphic Design, an amazing Illustrative Text Design in Corel Draw.

This also will be our steps to create the design.


After that go to the " Shape Tool " in the left toolbar, and double click and drag in the left middle lines to create a custom corner.

Use same way as above to shape the Box similar like below, this will be our base for the illustration.

Now we are going to make the lines curvy by right click on the middle lines between the corner and find " Convert to Curves " in the upper toolbar, now you see that there is an arrow in the corner, hold and drag to shape it.

Shape it similar like below, make sure all the lines is converted into curves.

Put Black color on the Base.

Shape it using " Shape Tool " same ways as step 3.

Now go to the " Text Tool " , left click anywhere on the screen and type any words that you want, in this tutorial i use " Harabara" font that you can download in this site, make sure the text that you type are in different size in order to make it vibrant.

After that select the text and go to the " Interactive Envelope Tool " in the left toolbar, after you press it go to the upper toolbar and find " Curve envelope type " , click and drag to shape the text similar like below.

After that lets put color in it by go to the " Fountain Fill Tool " and apply the value below, you can make custom color by left click on the color box.


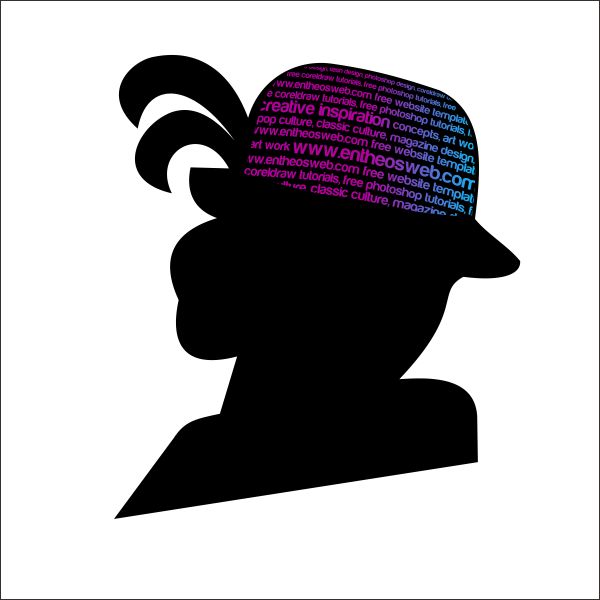
After that, we are going to insert the Text into the Hat shape using " PowerClip", left-click the text and then go to the top toolbar and find Effect > Powerclip > Place Inside Container, then you will see a black arrow, Left-click it to the Hat shape, and now you will see that the Text is inside the Hat Shape, you can go "inside" or "outside" the container by holding Ctrl while double-clicking it.

Now arrange the Hat shape on top of the Black base that we previously create.

Shape it using " Shape Tool ", make sure you change all the lines into curves.

Now create a text shape, type anything that you like, and shape it using " Envelope Tool " same ways as step 4.

After that lets put color in it by go to the " Fountain Fill Tool " and apply the value below, you can make custom color by left click on the color box.

Now place the text shape inside the First shape that you previously create using " PowerClip " same as step 5.

Select it and arrange it on top the Black base.

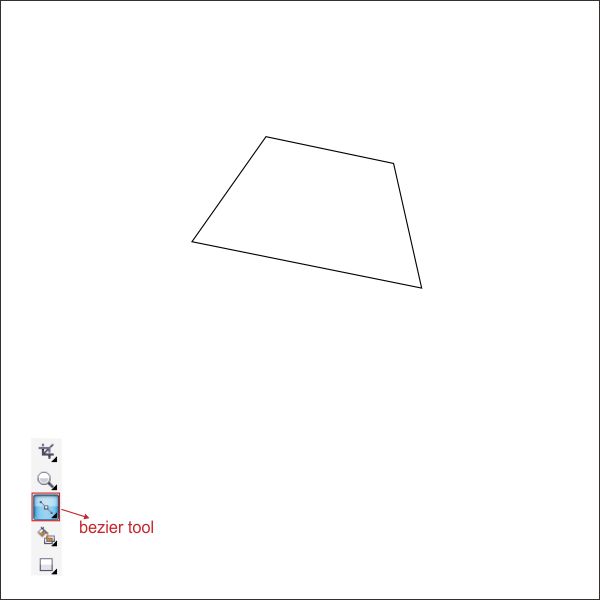
After that create another custom triangle shape using " Bezier Tool ".

Shape it using " Shape Tool " similar like below.

Copy the first Colored text shape.

Rotate it by double left click the text shape, and arrange it on top of the custom shape that you previously create.

Place the Text shape inside the Custom shape using " PowerClip Tool " same as step 5.

Now copy the custom shape and put it on the lower side of the original shape.

Now select both of the custom shape and group it by pressing " Ctrl + G ", after that arrange it on top of the Black Base.

After that copy the custom shape , put yellow color in it and place it on the Hair side of the Black base.

Okay now we are going to make the Face, starting with cheek, go to the " Bezier Tool " in the left toolbar, point and click to create a custom box shape similar like below, make sure the last click is connected to the first click if not you cannot put color in it.

Shape it using " Shape Tool " similar like below, this will be our cheek.

Now create another triangle shape using " Bezier Tool ".

Shape it using " Shape Tool " similar like below.

Arrange it on the right side of the Cheek.

After that create another custom shape using " Bezier Tool ".

Shape it using " Shape Tool " similar like below, this will be our nose.

Arrange it on the right side of the custom shape that you previously create.

After that create a custom " L " shape using " Bezier Tool ".

Shape it using " Shape Tool " similar as below.

Arrange it on the right side of the Nose shape that you previously create.

Create another Triangle shape using " Bezier Tool ".

Shape it using " Shape Tool " similar like below.

Arrange it on the middle right side of the Cheek.

After that we are going to make the right side Cheek, create a custom shape using " Bezier Tool " same as below.

Shape it using " Shape Tool " similar like below.

Arrange it pn the right side of the Nose.

Now we are going to create the upper lips, create another triangle shape using " Bezier Tool ".

Shape it using " Shape Tool " similar like below.

Arrange it on the right bottom side of the Cheek.

After that we are going to create the bottom lips, make a custom box shape using " Bezier Tool ".

Shape it using " Shape Tool " similar like below.

Arrange it on the bottom of the Upper lips.

Now we are going to make the Neck, go to the " Bezier Tool " and create a custom triangle shape similar like below.

Shape it using " Shape Tool " similar like below.

Arrange it on the bottom of the Cheek.

After that we are going to make the Shoulder, go to the " Bezier Tool " and create a custom box shape similar like below.

Shape it using " Shape Tool " similar like below.

Arrange it on the bottom right side of the Face.

Create another custom box shape using " Bezier Tool " similar like below.

Shape it using " Shape Tool " similar like below.

Arrange it on the bottom of the Face.


Shape it using " Envelope Tool " similar like below.

Now rotate the text shape and place it inside the Cheek, using " PowerClip ".


Using same steps as above, apply it on all of the Illustration.

After that select all of them and group it by pressing " Ctrl + G " and arrange it on top of the Black base.


Now please download the Background texture in the Tutorial Assets above, after you download it import it inside the Worksheet by pressing " Ctrl + I ".

After that arrange the Background Texture on top of the Black Bacground.
Place the Texture inside the Black background using " PowerClip "

After that select the Illustration and arrange it on top of the Background.

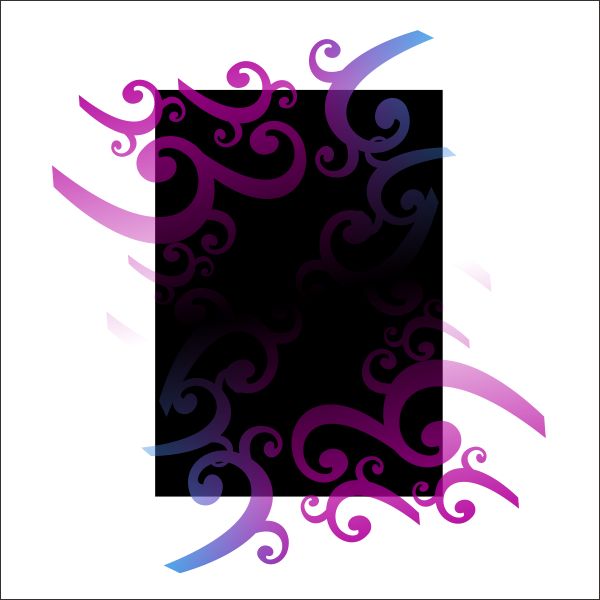
Now we are going to add some elements in the Poster, go to the " Bezier Tool " and create a custom box shape similar like below.

Put pink color in it or any color that you like.

After that go to the " Interactive Transparency Tool " in the left toolbar, now you see that the cursor are changing into a glass, drag it from bottom to top in order to make it transparent.

Copy and duplicate it, and arrange it on top and bottom of the Background.

Place it inside the Background using " PowerClip Tool ".


Step 1 : Basic Elements
First of all you have to use CorelDraw with version 11+. In this tutorial I use CorelDraw X5, Okay lets get started. Let’s take a look at the basic elements used to create our design :This also will be our steps to create the design.
Step 2 : Creating Worksheet
Okay, now that you know the steps and elements, we will begin, first of all open your CorelDraw program, now create a new file and set the paper size to A2 which is standard poster size.Step 3 : Working with Bezier and Shape Tool
We are going to use these tool a lot in this tutorial, first go to the " Bezier Tool " in the left toolbar, point and click to create a custom box shape similar like below, make sure the last click is connected to the first click if not you cannot put color in it.After that go to the " Shape Tool " in the left toolbar, and double click and drag in the left middle lines to create a custom corner.
Use same way as above to shape the Box similar like below, this will be our base for the illustration.
Now we are going to make the lines curvy by right click on the middle lines between the corner and find " Convert to Curves " in the upper toolbar, now you see that there is an arrow in the corner, hold and drag to shape it.
Shape it similar like below, make sure all the lines is converted into curves.
Put Black color on the Base.
Step 4 : Working with Envelope Tool
We will begin to create the illustration starting with the Hat, go to the " Bezier Tool " and create another custom box shape.Shape it using " Shape Tool " same ways as step 3.
Now go to the " Text Tool " , left click anywhere on the screen and type any words that you want, in this tutorial i use " Harabara" font that you can download in this site, make sure the text that you type are in different size in order to make it vibrant.
After that select the text and go to the " Interactive Envelope Tool " in the left toolbar, after you press it go to the upper toolbar and find " Curve envelope type " , click and drag to shape the text similar like below.
After that lets put color in it by go to the " Fountain Fill Tool " and apply the value below, you can make custom color by left click on the color box.
Step 5 : Working With PowerClip
Okay now arrange the colored text on top of the Hat shape.After that, we are going to insert the Text into the Hat shape using " PowerClip", left-click the text and then go to the top toolbar and find Effect > Powerclip > Place Inside Container, then you will see a black arrow, Left-click it to the Hat shape, and now you will see that the Text is inside the Hat Shape, you can go "inside" or "outside" the container by holding Ctrl while double-clicking it.
Now arrange the Hat shape on top of the Black base that we previously create.
Step 6 : Creating The Illustration
Now you already know how to work with " Bezier and Shape Tool ", create a custom box shape like in picture below.Shape it using " Shape Tool ", make sure you change all the lines into curves.
Now create a text shape, type anything that you like, and shape it using " Envelope Tool " same ways as step 4.
After that lets put color in it by go to the " Fountain Fill Tool " and apply the value below, you can make custom color by left click on the color box.
Now place the text shape inside the First shape that you previously create using " PowerClip " same as step 5.
Select it and arrange it on top the Black base.
After that create another custom triangle shape using " Bezier Tool ".
Shape it using " Shape Tool " similar like below.
Copy the first Colored text shape.
Rotate it by double left click the text shape, and arrange it on top of the custom shape that you previously create.
Place the Text shape inside the Custom shape using " PowerClip Tool " same as step 5.
Now copy the custom shape and put it on the lower side of the original shape.
Now select both of the custom shape and group it by pressing " Ctrl + G ", after that arrange it on top of the Black Base.
After that copy the custom shape , put yellow color in it and place it on the Hair side of the Black base.
Okay now we are going to make the Face, starting with cheek, go to the " Bezier Tool " in the left toolbar, point and click to create a custom box shape similar like below, make sure the last click is connected to the first click if not you cannot put color in it.
Shape it using " Shape Tool " similar like below, this will be our cheek.
Now create another triangle shape using " Bezier Tool ".
Shape it using " Shape Tool " similar like below.
Arrange it on the right side of the Cheek.
After that create another custom shape using " Bezier Tool ".
Shape it using " Shape Tool " similar like below, this will be our nose.
Arrange it on the right side of the custom shape that you previously create.
After that create a custom " L " shape using " Bezier Tool ".
Shape it using " Shape Tool " similar as below.
Arrange it on the right side of the Nose shape that you previously create.
Create another Triangle shape using " Bezier Tool ".
Shape it using " Shape Tool " similar like below.
Arrange it on the middle right side of the Cheek.
After that we are going to make the right side Cheek, create a custom shape using " Bezier Tool " same as below.
Shape it using " Shape Tool " similar like below.
Arrange it pn the right side of the Nose.
Now we are going to create the upper lips, create another triangle shape using " Bezier Tool ".
Shape it using " Shape Tool " similar like below.
Arrange it on the right bottom side of the Cheek.
After that we are going to create the bottom lips, make a custom box shape using " Bezier Tool ".
Shape it using " Shape Tool " similar like below.
Arrange it on the bottom of the Upper lips.
Now we are going to make the Neck, go to the " Bezier Tool " and create a custom triangle shape similar like below.
Shape it using " Shape Tool " similar like below.
Arrange it on the bottom of the Cheek.
After that we are going to make the Shoulder, go to the " Bezier Tool " and create a custom box shape similar like below.
Shape it using " Shape Tool " similar like below.
Arrange it on the bottom right side of the Face.
Create another custom box shape using " Bezier Tool " similar like below.
Shape it using " Shape Tool " similar like below.
Arrange it on the bottom of the Face.
Step 7 : Inserting the Text into the Illustration
Now that we have our base Illustration, we are going to insert a text inside it, copy the Text shape that you previously create.Shape it using " Envelope Tool " similar like below.
Now rotate the text shape and place it inside the Cheek, using " PowerClip ".
Using same steps as above, apply it on all of the Illustration.
After that select all of them and group it by pressing " Ctrl + G " and arrange it on top of the Black base.
Step 8 : Creating the Background
Now that we have our Illustration ready, lets make the background, go to the " Ellipse Tool " in the left toolbar, create a box shape and resize it as below.Now please download the Background texture in the Tutorial Assets above, after you download it import it inside the Worksheet by pressing " Ctrl + I ".
After that arrange the Background Texture on top of the Black Bacground.
Place the Texture inside the Black background using " PowerClip "
After that select the Illustration and arrange it on top of the Background.
Now we are going to add some elements in the Poster, go to the " Bezier Tool " and create a custom box shape similar like below.
Put pink color in it or any color that you like.
After that go to the " Interactive Transparency Tool " in the left toolbar, now you see that the cursor are changing into a glass, drag it from bottom to top in order to make it transparent.
Copy and duplicate it, and arrange it on top and bottom of the Background.
Place it inside the Background using " PowerClip Tool ".
Final Image
And we are done, you can customize it by adding more color, text, shadow or texture like the final image below.
No comments:
Post a Comment